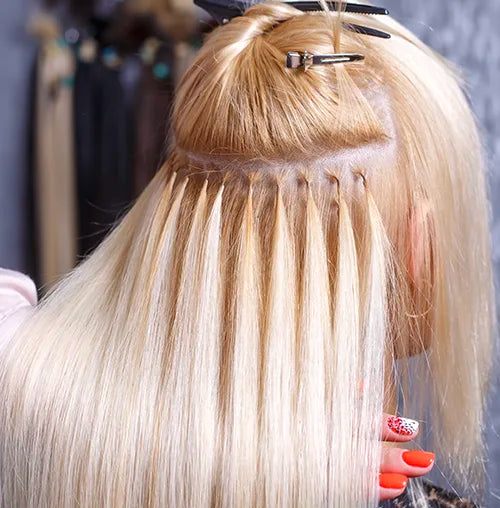
How to Put in Clip-In Hair Extensions for Beginners
Share
How to Put in Clip-In Hair Extensions for Beginners | Classique Nail Salon
Hair extensions are an easy and versatile way to add length, volume, or a pop of color to your natural hair. If they are made from 100% human hair, they can be styled just like your own—curled, straightened, and even dyed. However, correct application is key to ensuring they blend seamlessly and look natural. Whether you have short, fine, thick, or curly hair, following the right steps will give you a flawless finish.
Quick Steps to Applying Clip-In Hair Extensions
✔ Section your hair about 1 inch above your neck and clip up the rest.
✔ Brush a 3-clip weft and clip it close to the root along the section.
✔ Create a new section 1-2 inches higher, then clip in a 4-clip weft.
✔ Continue sectioning and adding wefts until 2 inches below the crown.
✔ Install side wefts (2-clip wefts) above each ear for a balanced look.
✔ Use single-clip wefts to fill in thin areas or enhance volume.
Step-by-Step Guide to Applying Clip-In Hair Extensions
Step 1: Section the Hair for Even Placement
Using a rat-tail comb, create a horizontal part just below your ears. Clip up the rest of your hair and ensure the section is even.
📌 Tip: Brushing your hair before application ensures a smooth base for the wefts.
Step 2: Attach the First Weft at the Nape of the Neck
Take a 3-clip weft and snap open the clips. Place it as close to the roots as possible and secure the middle clip first, followed by the side clips.
🚨 Avoid placing extensions too close to your hairline—keep them 1 inch away for a more natural blend.
Step 3: Install a Larger Weft at Mid-Ear Level
Release another 1-inch section of hair and create a new part at mid-ear level. Secure the upper hair into a bun. Clip in a 4-clip weft to add more volume.
📌 Tip: Some sets come with longer and shorter 4-clip wefts—use the shorter one here for a gradual blend.
Step 4: Apply the Longest Weft Above the Ears
Let down another 1-inch section of hair, parting it just above the ears. Install your longest weft (a 5-clip or longer 4-clip weft) at the roots.
Step 5: Blend the Crown with a Smaller Weft
Measure 2 inches down from the crown and create a final horizontal part. Clip in a 3-clip weft to ensure a seamless blend with your natural hair.
Step 6: Apply Side Wefts for a Natural Look
Create small sections above each ear, about 2 inches up. Clip in 2-clip wefts to frame the face naturally.
Step 7: Fill in Thin Areas with 1-Clip Wefts
If you have uneven density or want a fuller appearance, place single-clip wefts near the temples and hairline.
📌 Tip: If you part your hair to the side, add extra wefts to the thicker side to balance the volume.
Step 8: Remove Extensions Before Bedtime
Before sleeping, carefully unclip and remove each weft, starting from the top. Never sleep in clip-ins, as they can damage your natural hair.
📌 Tip: Store your extensions in a silk bag or hanger to maintain their longevity.
Tips for Short or Thin Hair
✔ Trim & layer the extensions for a more natural blend.
✔ Choose a slightly lighter shade for a soft ombre effect.
✔ Tease your roots before applying extensions to add grip & volume.
✔ Use fewer wefts if your hair is thin to avoid an unnatural bulk.
✔ Ensure the wefts are hidden by gently shaking your head after application.
✔ Curl or wave the extensions to seamlessly blend with your natural hair.
Preparation Tips for the Best Results
✔ Choose the right shade to match your natural hair.
✔ Organize wefts by clip number for an easy installation process.
✔ Brush extensions gently to remove tangles before application.
✔ Style your hair first so the extensions blend better.
✔ Wash and dry your natural hair before applying extensions for better grip.
FAQs About Clip-In Hair Extensions
1. Can I style my clip-in extensions?
Yes! If they are 100% human hair, you can curl, straighten, and dye them just like your own hair.
2. How long do clip-in extensions last?
With proper care, high-quality clip-ins last 6-12 months with regular use.
3. How often should I wash my clip-in extensions?
Every 10-15 wears or when there is product buildup. Use sulfate-free shampoo for the best results.
4. Can I sleep in my clip-in extensions?
No, sleeping in clip-ins can cause tangling, breakage, and scalp discomfort.
5. Will clip-in extensions damage my natural hair?
No, as long as they are applied correctly and removed gently. Avoid pulling or tugging.
6. Can I wear clip-in extensions every day?
Yes! Just make sure to remove them before bed to prevent tangling and strain.
7. How do I stop my extensions from slipping?
Backcomb the roots or use texturizing spray before clipping them in for a stronger grip.
8. Are clip-in extensions suitable for thin hair?
Yes! However, choose lightweight extensions and place them strategically for the most natural look.
9. How do I blend clip-ins with short hair?
Trim and layer the extensions to match your natural hair length and style.
10. Can I swim with clip-in hair extensions?
It’s not recommended. Saltwater and chlorine can damage the extensions and weaken the clips.
Why Choose Clip-In Extensions from Classique Nail Salon?
At Classique Nail Salon, we offer high-quality, 100% Remy human hair clip-in extensions that:
✔ Blend seamlessly with your natural hair
✔ Last longer with proper care
✔ Come in a variety of shades to match your hair perfectly
✔ Are lightweight & comfortable for all-day wear
✨ Want to elevate your look? Book an appointment at Classique Nail Salon today and let our experts help you achieve your dream hairstyle!

